Including internal Navigation Links for Web Site exports
Please be advised: internal linking is only available for Web Site exports. Even within eXe itself, the internal links are not active; they must be exported into a Web Site in order to actually navigate across the links.
Other export types do not permit internal navigation links because Learning Management Systems often prefer to take care of all your contents navigational needs, including any page tracking statistics, if applicable. For this reason, eXe's internal navigational links are only enabled for export to Web Site content and will be disabled on other exports.
That said, internal linking is automatically available for each node of your outline pane. In other words, you can create links in your (Web Site) content to any other page in your content. Each node automatically has an internal anchor at the top of its page, shown as the "auto_top" anchor. You may even notice that any links to these internal anchors are updated with any changes to the anchor's node name or relative position in the outline pane. See the next section for more on creating anchors in other page locations.
Select the desired link's source text and click on the link button:
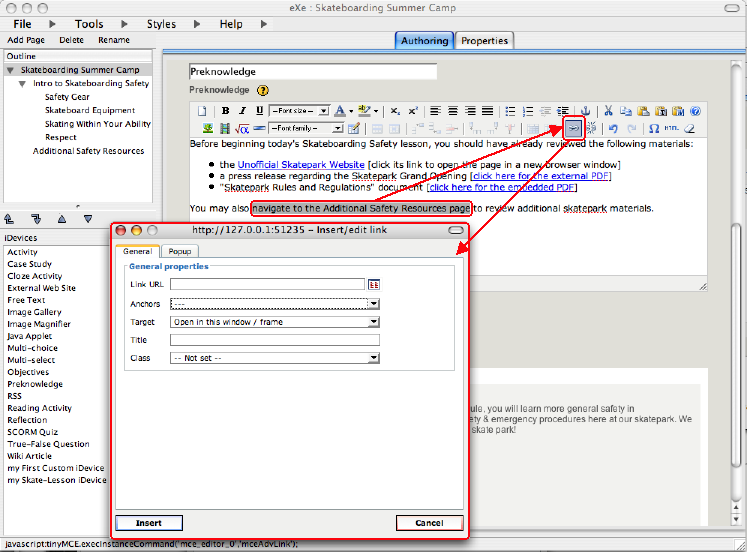
Choose the internal destination anchor from the link dialog's Anchors list:
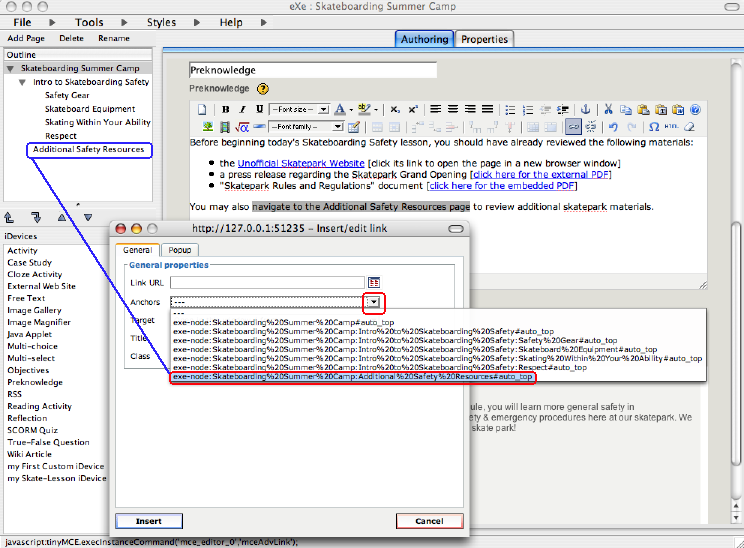
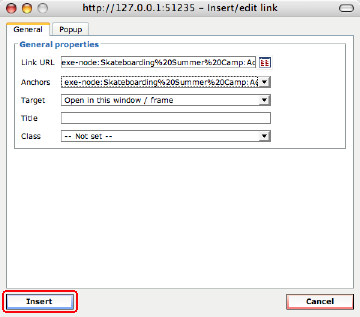
You might recognize the Anchors list as all of your project's current node names, though they might look a little bit strange. For example, "My node" may show as "My%20node" and so on. These are web-safe node names, and hopefully you can find your desired node name amongst the list. Select your desired node anchor (notice that the end with "#auto_top") and Insert the new link into the content:
Finally, press the iDevice's green "Done" check mark to process the content and its new link.
Once you have included an internal link within your content, remember to try and resist the temptation to navigate with it while in eXe. Again, these are only active for navigation once your content has been exported to a Web Site export type. If you do happen to click on such an internal link while still within eXe, you will encounter the following alert:
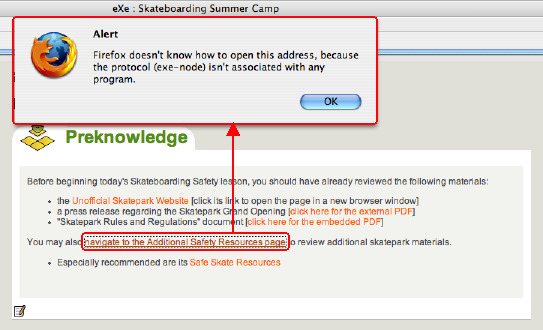
Merely click OK, for such an alert is indeed reasonable. Until the content is exported to a Web Site, internal links are simply not navigable.
Including more Anchors for internal Navigation Links
If you wish to provide any internal links that allow navigating into other locations within your nodes, rather than just at their automatic top anchors, you may define additional anchors. But as with any internal linking in general, these will really only be any use if you are exporting to a Web Site.
With your rich-text editor's text cursor located where you would like to place the new anchor, click on the TinyMCE anchor button to add new anchor:
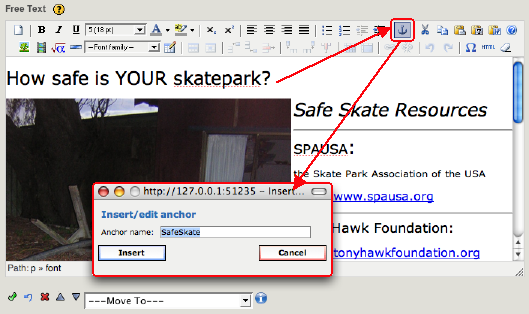
Provide the anchor a simple name and click on Insert to include the new anchor in the content:
![]()
Your anchor will only be visible when editing the rich-text field.
Now you may click on the iDevice's green "Done" check mark to process the anchor and make it available to list of available anchors.
Selecting an iDevice which happens to be on an entirely different node (you may link within the same node), edit it to add an internal link to the new anchor:
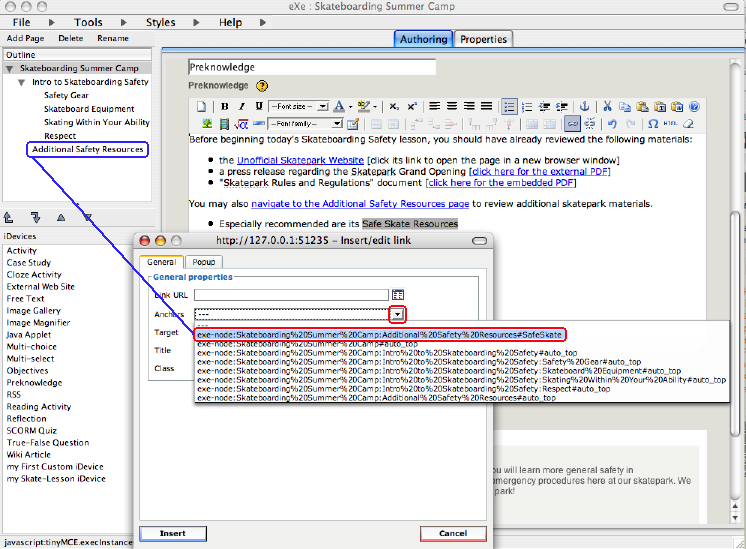
Notice that in the link dialog's Anchors list, the added anchor appears before all of the automatic "auto_top" anchors. All such anchors that you add will appear at the top of the Anchors list such that you can more easily find them.
Insert the new link into the content:

Finally, press the iDevice's green "Done" check mark and process the content and its new link.