Including Links and Attachments
![]() The TinyMCE "link" and "unlink" buttons can be used to create links just about anywhere in your content, in any rich-text field; or, to remove such links. These links come in two main varieties: "navigational" links, and "attached document" links.
The TinyMCE "link" and "unlink" buttons can be used to create links just about anywhere in your content, in any rich-text field; or, to remove such links. These links come in two main varieties: "navigational" links, and "attached document" links.
"Navigational" links are those that, when clicked from within your content, direct the web browser to a new destination page (optionally even in a new browser window). The resulting destination may be an external website, or possibly even an internal page of your content. In general, "navigational" links are simply referred to as "links", and may be created for the following:
- linking to external websites,
- or, linking to internal anchors (only for Web Site exports).
"Attached document" links are those that, when clicked from within your content, open up the linked document for viewing in its associated helper application, if available. For example, an attached .PDF document might open up in Adobe's Acrobat Reader, or other such helper application. In general, these are also simply referred to as "attachments", and may be created for the following:
- to attach externally Web-hosted file resources of any type,
- or, to attach, and internally embed, local File-based resources of any type.
Take a look at some sample content that has already included each of the above link and attachment types:

The above sample Preknowledge iDevice has the following link and attachment types, in order:
- a navigation link to an external website (the "Unofficial Skatepark Website"),
- an external Web-based attachment (PDF press release "Skatepark Grand Opening"),
- an internally embedded File-based attachment (PDF "Skatepark Rules and Regulations"),
- and an internal navigation link to another node within this content, "Additional Safety Resources".
The bottom-most link, the sample internal navigation link, also happens to shows how a link might appear within your content when the mouse hovers over it:
- the link text (or image, for that matter) is underlined (or bordered),
- and the link's title appears as a tooltip, in this case showing "internal link to the Additional Safety Resources page.
Note that the actual appearance of your links is controlled by your content's active Cascading Style Sheets (CSS).
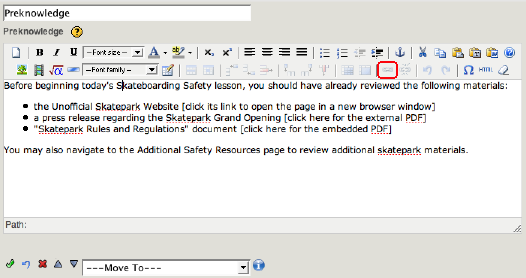
Now that you have seen how the links appear after they have been included, let's back up to see how they are included into the content. Before any links have been added, with only text placeholders for the links, the sample content appeared as:

Click on the iDevice's edit button to enter its edit mode:

... and notice that the TinyMCE link button is not yet enabled. In order to specify a link, you must first highlight and select some text and (and/or images) to become the link source.
Simple step-by-step examples for each of this sample's links will be shown below for you to follow along, beginning with a navigation link to an external website.